


 Systèmes Future-Net
 Produits reconditionés
 NAS - Stockage réseau
 Switches
 Caméras IP
 Processeurs
 Alimentation (P/S)
 Cartes mère
 Cartes Vidéo
 Mémoires
 Disques Durs
 Disques SSD
 Disques Externes
 Clés USB
 Câbles et adapteurs
 Console de jeux
 Cartes Mémoires
|
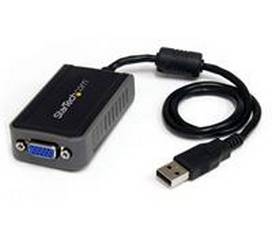
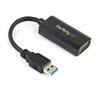
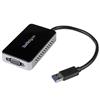
STARTECH USB 2.0 TO VGA VIDEO CARD ADAPTER 1680X1050 EXTERNAL GRAPHICS CARD
|
||||||||||||||||||||
 |
|
|||||||||||||||||||
|
||||||||||||||||||||


| Warranty Information | ||
|---|---|---|
| Warranty | 2 Years | |
| Hardware | ||
| Chipset ID | MCT - Trigger 1+ | |
| Memory | 16MB SDRAM | |
| USB Pass-Through | No | |
| Performance | ||
| General Specifications | This USB video adapter uses a Trigger family chipset. If you’re connecting this device to a computer along with additional USB video adapters or docking stations, please avoid using devices with a DisplayLink or Fresco family chipset. | |
| Supported Resolutions |
Standard: 1600x1200, 1400x1050, 1280x1024, 1280x960, 1152x864, 1024x768, 800x600 Widescreen: 1680x1050, 1440x900, 1280x800, 1280x768, 1152x864, 800x600 |
|
| Connector(s) | ||
| Connector A | 1 - USB Type-A (4 pin) USB 2.0 Male Input | |
| Connector B | 1 - VGA (15 pin, High Density D-Sub) Female Output | |
| Software | ||
| OS Compatibility |
Windows® 10 (32/64) Windows 8 / 8.1 (32/64) Windows 7(32/64) Windows Vista (32/64) Windows XP (32/64) |
|
| Special Notes / Requirements | ||
| System and Cable Requirements | One available USB 2.0 port | |
| Not intended for gaming | ||
| Physical Characteristics | ||
| Cable Length | 18 in [457.2 mm] | |
| Color | Gray | |
| Product Height | 2 in [50 mm] | |
| Product Length | 3 in [75 mm] | |
| Product Weight | 2.8 oz [80 g] | |
| Product Width | 1.7 in [42 mm] | |
| Packaging Information | ||
| Shipping (Package) Weight | 8.2 oz [233.6 g] | |
| What's in the Box | ||
| Included in Package | 1 - USB to VGA Adapter | |
| 1 - Driver and Software CD | ||
| 1 - Instruction Manual | ||
Compatibility


Windows 8 / 8.1 (32/64)
Windows 7(32/64)
Windows Vista (32/64)
Windows XP (32/64)
Certifications


Related Products
USB to VGA External Video Card Multi Monitor Adapter – 1920x1200
Connect a VGA display for an entry-level extended desktop, multi-monitor USB solution
6148+ In stock In stock
CA: 226 | US: 5922 In stock
Learn More
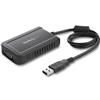
USB 3.0 to VGA External Video Card Multi Monitor Adapter for Mac and PC – 1920x1200 / 1080p
Connect a VGA monitor or projector through USB 3.0, for an external multi-monitor solution at resolutions up to 1920x1200
468+ In stock In stock
CA: 15 | US: 453 In stock
Learn More

USB to VGA Adapter - External USB Video Graphics Card for PC and MAC- 1920x1200
Connect a VGA display for an extended desktop multi-monitor USB solution
1448+ In stock In stock
CA: 12 | US: 1436 In stock
Learn More
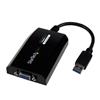
Slim USB 3.0 to VGA External Video Card Multi Monitor Adapter – 1920x1200 / 1080p
Connect a VGA display through this slim USB 3.0 Adapter for a multi-monitor solution ideal for your Ultrabook® or Laptop
1670+ In stock In stock
CA: 109 | US: 1561 In stock
Learn More
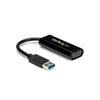
USB 3.0 to VGA video adapter - on-board driver installation - 1920x1200
Add a secondary VGA display to your USB 3.0 enabled PC, and install the drivers without a CD or Internet connection
492+ In stock In stock
CA: 0 | US: 492 In stock
Learn More
USB 3.0 to VGA External Video Card Multi Monitor Adapter with 1-Port USB Hub – 1920x1200
Connect a VGA-equipped display through USB 3.0, while keeping the USB 3.0 port available
1771+ In stock In stock
CA: 70 | US: 1701 In stock
Learn More
Accessories

1 ft Coax High Resolution Monitor VGA Video Cable - HD15 to HD15 M/M
Connect your VGA monitor with the highest quality connection available
3 ft Coax High Resolution Monitor VGA Cable - HD15 M/M
Connect your VGA monitor with the highest quality connection available
6 ft Coax High Resolution Monitor VGA Video Cable - HD15 to HD15 M/M
Connect your VGA monitor with the highest quality connection available
10 ft Coax High Resolution VGA Monitor Cable HD15 M/M
Connect your VGA monitor with the highest quality connection available
20 ft Coax High Resolution Monitor VGA Cable HD15 M/M
Connect your VGA monitor with the highest quality connection available
25 ft Coax High Resolution Monitor VGA Cable - HD15 M/M
Connect your VGA monitor with the highest quality connection available
30 ft Coax High Resolution Monitor VGA Cable - HD15 M/M
Connect your VGA monitor with the highest quality connection available
Product Support
Drivers & Downloads
Driver(s):
-
[Trigger MCT] USB Display Adapter.zip
Version: 18.01.0118.3679 - Windows_Release_Notes.txt
Manual(s):
-
USB2DVIE2_VGAE2_rev_1.pdf
English
Compliance Letter(s):
Data Sheet(s)
-
USB2VGAE2_Datasheet.pdf
English
Frequently Asked Questions
Before You Buy
You may have heard of USB video adapters, and have been wondering what they are, and whether or not they will work in your setup.
USB video adapters are devices that take one USB port and go to one or many video connections, such as VGA, DVI, HDMI or DisplayPort. This is useful if you would like to add an additional display to your computer setup, but are out of video connections on your computer.
USB video adapters allow you to mirror or duplicate your display, so the same windows are shown on all of your displays, or extend your desktop, so that you can have different windows on each display.
So what do you need to know before you purchase a USB video adapter?
- USB video adapters require the computer to have a free USB port.
- Check which video connections your display has, and select the appropriate USB video adapter.
- Ensure that the USB video adapter is compatible with your operating system.
- USB video adapters require your video card to be able to handle an additional display. This is because USB video adapters work with your onboard or dedicated video card to drive additional displays. For this reason you are advised to confirm this with your video card manufacturer.
- Consider what you will be doing on the additional display. If you are looking to perform less graphically intensive activities like using Microsoft Office, email, or basic web surfing, you can use any USB video adapter. If you are looking to perform more graphically intensive activities like high end photo or video editing, you want a USB video adapter with dedicated memory.
There are a few other important things to note:
- When using multiple USB video adapters on the same computer, they need to use the same chipset family. For example, MCT/Trigger, DisplayLink or Fresco. Note: How many adapters you can use depends on the SKU.
- You may not be able to use a USB video adapter with an All-In-One computer. These computers are almost always hardwired to only accept a single display.
- You may not be able to use a USB video adapter with a touchscreen computer or display. A mixture of touchscreen and non-touchscreen devices can conflict with the video card.
- You should not use a USB video adapter to play video games. They are not designed for use with video games, and their performance with them is poor at best.
Copy Link
Was this information helpful? Yes No
Installation
Note: Do not physically connect the USB video adapter to your computer until you are instructed to (Step 5).
Prior to installing this device, please ensure that your operating system is up to date (for example, you have installed the most recent service pack).
To install the driver:
- Download the latest drivers from the StarTech.com website (http://www.startech.com/Support). You can find the part number and product ID on the product’s packaging.
Note: Windows will typically save the files to the Downloads folder that is associated with your user account (for example, C:\Users\your_name\Downloads).
- Once the download is complete, right-click the zip folder that you downloaded, select Extract All, and follow the on-screen instructions.
- In the list of extracted files, right-click the Setup.exe file and select Run as Administrator.
Note: If the Run as Administrator option is not available, you might be attempting to run the installer from within the zipped file. Extract the files using the instructions in Step 2.
- Follow the on-screen prompts to install the device drivers and restart the computer when prompted.
- Once Windows has restarted, connect the USB video adapter to your computer.
- Your computer will automatically complete the driver installation and your device should be ready to use.
Note: Installation may take several seconds to complete. During the installation your display might flicker; this is normal. Once the installation has completed you will see your Windows desktop extended to the additional monitor.
Copy Link
Was this information helpful? Yes No
Note: Do not physically connect the USB video adapter to your computer until you are instructed to (Step 5).
Prior to installing this device, ensure that your operating system is up to date (for example, you have installed the most recent service pack).
To install the driver:
- Download the latest drivers from the StarTech.com website (http://www.startech.com/Support). You can find the part number and product ID on the product’s packaging.
Note: Windows will typically save the files to the Downloads folder that is associated with your user account (for example, C:\Documents and Settings\your_name\My Documents\Downloads).
- Once the download is complete, right-click the zip folder that you downloaded, select Extract All, and follow the on-screen instructions.
- In the list of extracted files, double-click the Setup.exe file.
- Follow the on-screen prompts to install the device drivers and restart the computer when prompted.
- Once Windows has restarted, connect the USB video adapter to your computer.
- Your computer will automatically complete the driver installation and your device should be ready to use.
Note: Installation may take several seconds to complete. During the installation your display might flicker; this is normal. Once the installation has completed you will see your Windows desktop extended to the additional monitor.
Copy Link
Was this information helpful? Yes No
Note: Physically disconnect your USB Video Adapter from the computer before completing the steps below.
Windows 10 / 8
- On your keyboard, press the Windows Key + X.
- Click Control Panel.
- Click Programs and Features.
- Click Uninstall a program to display a list of all installed software on your computer.
- Locate and select the USB Display Device (Trigger Family) software.
- Click Uninstall at the top of your screen to begin the removal process and restart your computer when prompted.
Windows 7 / Vista
- Click Start.
- Click Control Panel.
- Click Programs and Features.
- Click Uninstall a program to display a list of all installed software on your computer.
- Locate and select the USB Display Device (Trigger Family) software.
- Click Uninstall at the top of your screen to begin the removal process and restart your computer when prompted.
Windows XP
- Click Start.
- Click Control Panel.
- Click Add/Remove Programs to display a list of all installed software on your computer.
- Locate and select the USB Display Device (Trigger Family) software.
- Click Remove to begin the removal process and restart your computer when prompted.
Copy Link
Was this information helpful? Yes No
How to
To confirm that Windows detects your USB device, complete the following:
- Press the Windows key+R, type devmgmt.msc, and press Enter.
- In Device Manager, under the appropriate heading, confirm that your expansion card is listed and that there isn't an exclamation mark next to it. For example, a USB controller card would be under Universal Serial Bus controllers.
Your USB device is listed according to the name of the chipset. To determine the name of the chipset of your USB device, navigate to www.StarTech.com and look on the Technical Specifications tab for your product.
Copy Link
Was this information helpful? Yes No
Windows 10 / 8
- On your keyboard, press the Windows Key + X and select Control Panel.
- Click Appearance and Personalization, then click Display.
- Click the Resolution or Adjust Resolution option from the left column.
- Expand the drop-down menu next to “Multiple displays” and select Duplicate these Displays.
- Click OK to apply the changes and close the window.
Windows 7 / Vista
- Click the Start button and select Control Panel.
- Click Appearance and Personalization, then click Display.
- Click the Resolution or Adjust Resolution option from the left column.
- Expand the drop-down menu next to “Multiple displays” and select Duplicate these Displays.
- Click OK to apply the changes and close the window.
Windows XP
- Click the Start button and select Control Panel.
- Double-click Display.
- Click the Settings tab.
- Un-check the box beside Extend my Windows desktop onto this monitor.
- Click OK to apply the changes and close the window.
Copy Link
Was this information helpful? Yes No
Troubleshooting
When you troubleshoot issues with a USB video adapter, there are some quick tests that you can complete to rule out potential problems. You can test to make sure that the following components are working correctly and are not the source of the issue:
-
Video cables
-
Video source
-
Video destination
-
USB video adapter
To test your setup components, try the following:
-
Use the video cables, video source, video destination, and USB video adapter in another setup to see if the problem is with the components or the setup.
-
Use a different video cable, video source, video destination, and USB video adapter in your setup to see if the problem persists. Ideally, you should test a component that you know works in another setup.
When you test your cables, it is recommended that you do the following:
-
Test each cable individually.
-
Use short cables when you are testing.
When you test the video cables, video source, video destination, and USB video adapter, it is recommended that you do the following:
-
Check Device Manager under Display adapters, Universal Serial Bus controllers, or USB Display adapters. To do this, press the Windows key + R, type devmgmt.msc, and press Enter to open Device Manager.
-
If you do not see the USB video adapter in Device Manager, refer to the following FAQ: https://www.startech.com/support/faqs/technical-support?topic=expansion-cards#usb-cannot-detect-windows.
-
If the device is listed with an error, reinstall the drivers following the instructions on the website.
-
Check to see if your video card drivers are current. You can check what video card you have in Device Manager under Display adapters. It is recommended that you go directly to the video card manufacturer's website to check for the latest drivers.
-
Check to see if the monitor is being detected by Windows.
To check to see if Windows is detecting the monitor using a computer that is running a version of Windows XP, do the following:
- Right-click on the desktop and click Properties.
- Click the Settings tab.
- If you see Drag the monitor icons to match the physical arrangement of your monitors, it means that Windows is detecting more than a single monitor. You can click the drop-down menu under Display to see which monitors are detected. This option is not available if Windows only detects a single monitor.
To check to see if Windows is detecting the monitor using a computer that is running a version of Windows Vista, Windows 7, or Windows 8, do the following:
- Right-click on the desktop and click Screen Resolution.
- You can click the drop-down menu under Display to see which monitors are detected.
Copy Link
Was this information helpful? Yes No
If hardware acceleration is enabled on any of your software applications, it can result in poor resource management and limit the performance of your video device. If you
experience this problem, you should disable hardware acceleration in the program(s) that were impacted.
To disable hardware acceleration in common applications and operating systems, complete one of the following series of steps, depending on what software application(s)
or operating system that you are running.
Internet Explorer 9 and later
Note: Earlier versions of Internet Explorer do not use hardware acceleration.
- Click the Start button.
- Open Control Panel.
- Click Network and Internet.
- Click Internet Options.
- Click the Advanced tab.
- Browse to the Accelerated graphics screen.
- Select the Use software rendering instead of GPU rendering check box.
- Click Apply.
- Restart your computer.
Mozilla Firefox
- Open Firefox.
- Press the Alt key.
- Click Tools and Options.
- Click the Advanced icon.
- Click the General tab.
- Under Browsing, clear the Use hardware acceleration when available check box.
- Click the OK button.
- Restart your web browser.
Google Chrome
- Open Google Chrome.
- Click the Options icon (it has three horizontal lines on it).
- Click Settings.
- Click Show advanced settings.
- Scroll to the bottom of the screen and clear the Use hardware acceleration when available check box.
- Restart your web browser.
Microsoft Office 2013 / 2010
- Open any program in Microsoft Office (for example, Microsoft Word).
- Click the File tab.
- In the menu on the left side of the screen, click Options.
- Click Advanced.
- Under Display, select the Disable hardware graphics acceleration check box.
- Close and restart all of the Microsoft Office programs that you had open.
Windows 10 / 8
- Press the Windows key +X.
- Click Control Panel.
- Click Personalization.
- Select a high-contrast theme.
Windows 7 / Vista
- Click the Start button.
- Click Control Panel.
- Click Personalization.
- Select a non-Aero theme. Ideally, you should select a basic and high-contrast theme.
Windows XP
- Click the Start button.
- Open the Control Panel.
- Select Display.
- Click the Settings tab.
- Click Advanced.
- Click the Troubleshooting tab.
- Move the Hardware Acceleration slider to None.
- Restart your computer.
Copy Link
Was this information helpful? Yes No
If the display connected through your USB display adapter does not wake up after your computer has been in extended hibernation, it is likely that Windows has automatically turned off
the USB Root hub to save power.
The steps below outline how to configure the USB root hub to stay on during hibernation, to prevent this from happening.
Windows 8 / 10
- On your keyboard, press the Windows key + X and select Control Panel.
- Click Hardware and Sound, then click Power Options.
- Click Change plan settings for the plan you want to change.
- Click Change advanced power settings.
- Click the plus sign (+) next to “USB settings” and “USB selective suspend setting” to expand the options and change the setting to Disabled.
- Click OK to apply the setting.
Note: You may need to disconnect and re-connect your USB display adapter after applying these settings to re-establish the connection.
Windows 7 / Vista
- Click the Start button and select Control Panel.
- Click Hardware and Sound, then click Power Options.
- Click Change plan settings for the plan you want to change.
- Click Change advanced power settings.
- Click the plus sign (+) next to “USB settings” and “USB selective suspend setting” to expand the options and change the setting to Disabled.
- Click OK to apply the setting.
Note: You may need to disconnect and re-connect your USB display adapter after applying these settings to re-establish the connection.
Windows XP
- On your desktop, right-click the My Computer icon and select Properties.
- Click the Device Manager tab.
- Expand Universal Serial Bus controllers by clicking the arrow to the left of it.
- Right-click the first USB Root Hub device and select Properties.
- Click the Power Management tab.
- Clear the box next to Allow the computer to turn off this device to save power.
- Click OK to apply the setting.
- Repeat steps 4-7 for any remaining devices in the Universal Serial Bus Controllers section with “Root Hub” in the name.
Note: You may need to disconnect and re-connect your USB display adapter after applying these settings to re-establish the connection.
Copy Link
Was this information helpful? Yes No
While the purpose of our USB Video Adapters are to add an additional video output to your laptop or desktop computer, these adapters still require some resources from your internal
video card. On a small number of video cards, adding a USB Video Adapter can exceed the limit of available resources, causing one of the connected displays to turn off.
As a possible workaround for this issue, we recommend using a more powerful USB Video Adapter that has a higher amount of integrated RAM, such as our USB32VGAPRO (512MB), USB32DVIPRO (512MB), or USB32HDDVII (1GB).
Copy Link
Was this information helpful? Yes No
Touchscreen Monitors
A mixture of touchscreen and non-touchscreen displays can cause a conflict with your internal video card. Because of this limitation, touchscreen functions may be disabled when the USB Video Adapter is connected, or the USB Video Adapter may not work at all. Contact the manufacturer of your system to confirm whether your specific model can support a secondary display or not.
All-in-One Computers
Many all-in-one computer systems limit the number of possible monitors to one. This is a limitation in how all-in-one computers are typically manufactured, so adding an external display may not be possible regardless of which USB video adapter is used. Contact the manufacturer of your system to confirm whether your specific model can support a secondary display or not.
Copy Link
Was this information helpful? Yes No
When you use remote desktop software to access a computer with a USB video adapter, keep the following things in mind:
- Not all remote desktop software supports multiple monitors.
- Not all remote desktop software supports monitors that use USB video adapters.
- If the primary monitor is a monitor that uses a USB video adapter, you might run into problems. If you do, try to continue to log in as the display might come back once you log in.
Copy Link
Was this information helpful? Yes No
In order for your mouse to move properly between your monitors you must rearrange your monitors in Windows to match the physical location of your monitors on your desk. To do so, complete the following based on your operating system:
Windows 10 and Windows 8
- On your keyboard, press the Windows key + X and select Control Panel.
- Click Appearance and Personalization, then click Display.
- Click the Resolution or Adjust Resolution option from the left column, which will display your monitors as numbered icons.
- Click Identify to display the numbers on each connected monitor, showing how the operating system has assigned their positions.
- Click and drag the monitor icons to best match your physical setup.
- Click OK to apply the changes and close the window.
Windows 7 and Windows Vista
- Click the Start button and select Control Panel.
- Click Appearance and Personalization, then click Display.
- Click the Resolution or Adjust Resolution option from the left column, which will display your monitors as numbered icons.
- Click Identify to display the numbers on each connected monitor, showing how the operating system has assigned their positions.
- Click and drag the monitor icons to best match your physical setup.
- Click OK to apply the changes and close the window.
Windows XP
- Click the Start button and select Control Panel.
- Double-click Display.
- Click the Settings tab, which will display your monitors as numbered icons.
- Click Identify to display the numbers on each connected monitor, showing how the operating system has assigned their positions.
- Click and drag the monitor icons to best match your physical setup.
- Click OK to apply the changes and close the window.
To mirror the image from your primary monitor instead of extending your desktop, refer to the following FAQ: http://www.startech.com/faq/Windows_Mirroring_Monitors
Copy Link
Was this information helpful? Yes No
If Display pointer trails or Enhance pointer precision is enabled in your mouse settings, it can cause visibility issues with your mouse pointer on
the display attached to the USB video adapter.
To resolve the issue, you can disable Display pointer trails and Enhance pointer precision, by following the steps below:
Windows 10 / 8
- On your keyboard, hold down the Windows Key and press X.
- Click Control Panel.
- Click Hardware and Sound.
- Click Mouse located under Devices and Printers.
- Click the Pointer Options tab.
- Remove the check box from the Display pointer trails box.
- Remove the check from the Enhance pointer precision box.
- Click the Apply button.
Windows 7 / Vista
- Click Start.
- Click Control Panel.
- Click Hardware and Sound.
- Click Mouse located under Devices and Printers.
- Click the Pointer Options tab.
- Remove the check from the Display pointer trails box.
- Remove the check from the Enhance pointer precision box.
- Click the Apply button.
Windows XP
- Click Start.
- Click Control Panel.
Note: If your control panel is set to category view select Switch to Classic View
- Click Mouse.
- Click the Pointer Options tab.
- Under visibility, remove the check box from Display pointer trails.
If this has not resolved your issue, refer to the following FAQ: https://www.startech.com/faq/usb-video-adapters-hardware-acceleration.
Copy Link
Was this information helpful? Yes No
* Product appearance and specifications are subject to change without notice.
Faites votre évaluation...
 Ouverture de session...
